Family, friends and good food are the foundations of our lives. We celebrate with them, mourn with them and nothing can bring us comfort more than a steaming bowl of soup or a slice of chocolate cake except for the love of our family and friends...

Thursday, October 21, 2010

PEPPERMINT BARK


Peppermint Bark is one of our family traditions; others include lots of Santa's on the tree,
a hidden pickle ornament, French Horns for Becki, Peppermint Sticks 
 and tinsel put on at the last minute by Frank.


Warning this sweet little treat is addictive, one batch will never make it through the day. It is simple to make and is a wonderful and welcome gift for friends and family alike. It is a must around our house during the holidays and I always make enough to take to friends or our family Christmas.


Recipe makes 1 pound of candy.

2 cups (12 ounce package) White Chocolate Chips
24 hard peppermint candies

Line baking sheet with wax paper.

Microwave chips in a medium sized microwave safe bowl on 70 percent power for 1 minute. Stir. If needed heat an additional 10 to 15 seconds, stirring just until the chips are melted.

Put unwrapped peppermint candies in a food storage bag and seal. Crush candies by using a rolling pin or other heavy object, leaving some pieces a little larger for topping.

Using a strainer, pour candies through it onto the melted chocolate. Shake to release all the small bits. Reserve larger pieces.

Stir chocolate and peppermint mixture.

Spread mixture to desired thickness onto prepared baking sheet and then sprinkle with large pieces of candy. Press lightly.

Let stand until firm. Break into pieces and store in airtight container at room temperature.

BEST EVER CORNBREAD DRESSING


Beauty Berry Bush growing in my sister-in-laws yard...
can always count on Fall to be around the corner with they begin to show
their beautiful purple berries.

It has taken me years to perfect this recipe. I have borrowed an idea here and there, made my own choices and finally came up with a dressing that I love!


Please make it with homemade cornbread made from WHITE cornmeal or cornmeal mix as this is what makes it sooo good. I usually make my cornbread and biscuits the day before to save time.

4 cups cornbread crumbs
2 cups biscuit crumbs
4 eggs beaten
2 cups chicken broth
1 can cream of chicken soup
1/2 cup celery
1/2 cup onions
1/4 cup butter
2 tsp of sage or poultry seasoning
Salt and pepper to taste
1/2 cup chicken broth


Cook onions and celery in butter in skillet. Cool slightly then mix everything but broth in bowl. Slowly add broth a little at a time until combined. Mixture should be very moist but not wet and runny. Pour into a greased baking dish and then slowly pour the remaining broth a little at a time over the top of dressing. You don’t want it to puddle on top just add a little more moisture.


Bake at 350 degrees about 35 to 45 minutes until golden brown and firm.

Best Ever Cornbread Dressing on Foodista

PUMPKIN ROLL


This was one of the first desserts I learned to make after Frank and I were married. I adapted it to my taste and never looked back. It was a favorite of my mothers and a nice change to pumpkin pie.

3 eggs
1 cup sugar
2/3 cup canned pumpkin
1 tsp lemon juice
3/4 cup self-rising flour
2 tsp ground cinnamon
1 tsp ground ginger
1 tsp ground nutmeg
1 1/4 cups powdered sugar, divided
8 ounces cream cheese, at room temperature
1/4 butter at room temperature
1/2 tsp vanilla extract

In mixing bowl beat your eggs on high for 5 minutes than gradually add sugar and beat until smooth. Stir in the pumpkin and lemon juice. In separate bowl combine the flour and spice, then add to the pumpkin mixture blending well. Grease and flour a jellyroll pan and line it with waxed paper. Spread the batter evenly in pan.


Bake at 375 for 15 minutes or until done. Then turn cake out on a dish towel sprinkled with 1/4 cup of powdered sugar. Remove wax paper and roll cake up in towel. Cool.


To make frosting combine the rest of powdered sugar, cream cheese, butter and vanilla beating until smooth. Unroll the cake and spread with icing and roll it up again without the towel and then chill seam side down on serving tray. Makes 12 servings.

Saturday, September 11, 2010

GONE FISHING

I am taking a break for the next several weeks due to medical issues. I will be having surgery to remove part of my colon and then recuperating at home for 6 to 8 weeks so I won't be doing much cooking or blogging but I plan on getting back as soon as possible.

I look forward to The Fall every year and while I may not be doing much baking I'll leave you with thoughts of warm Cider, fresh Doughnuts (I finally bought a pan and a batter dispenser); Apple Pie, Pumkin Rolls, Carmel Apples and leaves falling....

Camella

Sunday, August 22, 2010

PORCUPINE BALLS

Many years ago on one of our trips home to Alabama, my dad's cousin Tootsie made us a meal of Porcupine Balls. My younger brother and I were in awe and fell in love with this simple meal.  Decades later we always remembered that special trip, Aunt Tootsie house and her Porcupine Balls.

I attempted to make them a couple of times for my family but was never satisfied, but decided recently to give them a go again and was transported back to my childhood... and Althea loved them.


A few of the simple ingredients that go into Porcupine Balls.


The finished product.


1 pound ground chuck or round
1 cup of converted rice
1 can condensed tomato soup
1 tablespoon diced onion
1 can beef broth
3 tablespoon Worcestershire sauce
salt and pepper

Mix ground meat, rice, salt and pepper, onion, 1 tablespoon Worcestershire sauce, 3 tablespoons soup and 1/4 to 1/2 cup of beef broth together and form meatballs. Add a small amount of broth at a time so meatballs will not become too soupy.

Brown meatballs in oil and drain. Place remainder of soup, broth and Worcestershire sauce back in pan and add meatballs. Add a small amount of water if needed and bring to a boil over medium heat. Reduce heat and simmer 20 minutes until meatballs and rice are cooked through, adding small amounts of water if needed.

Serve over cooked rice or mashed potatoes or by themselves. 

Tuesday, August 10, 2010

Heirloom Tomatoes


Having read about Heirloom seeds for several years, my husband and I decided to try our hand with growing heirloom tomatoes in our garden this year. We bought several different varieties of plants, planted them in our small garden spot and watched them take off…


We were impressed with the amount of fruit we collected off the Yellow Submarine and finally had to start giving them away to family and friends as they are a little small for processing but have a wonderful flavor. They are great in a tomato salad.


My favorite was the Big Rainbow as they are not only a wonderful color but they made a great Tomato Jam. This tomato has a lot of meat and so I had some nice fruit in the jam. I finally picked and froze enough of them that my next batch of jam should be a nice amber color and will certainly share the photos on here when I get it done.


I recommend to all home gardeners to try out a few of these “new” old plants in your garden, not only for something different but for the flavor that so many of the newer varieties just don’t have.

Monday, August 2, 2010

GUINNESS SPICED BEEF

This is a wonderful recipe. My son and I together prepared this dish for a family wedding and we quadrupled the recipe. There were very few leftovers, but what we did have left made the best roast beef sandwiches I have ever eaten. I only marinated this for 24 hours, but from what I am told you can do this for up to 3 days for a stronger flavor.


6 lbs sirloin tip roast or beef eye round
3 bay leaves, finely chopped
1 teaspoon ground mace
6 ground cloves
1 clove garlic, crushed and made into a paste with salt
1 teaspoon allspice
1 teaspoon crushed black peppercorns
2 1/2 teaspoons brown sugar
1/2 cup salt
1 bottle Guinness stout

Mix all the flavorings and spices together. Rub in the mixture once or twice a day for up to two days.
Place the beef in a large bowl and rub all over with the spice and flavoring mixture.
Cover and refrigerate.
The spices and flavorings will now be mixed with the juices drawn from the beef.

Tie up the meat firmly if needed and place in a roaster.
Rub in a last teaspoon of ground cloves.

Mix 1 1/2 cups cold water and a bottle of Guinness, pour into bottom of roaster.
Place rack in roaster and roast on rack.

Preheat Oven to 325 degrees and cook for about 3 to 4 hours until well done.
Allow to cool.
When cool, remove from the cooking liquid, place on a serving dish and cover with a weighted plate.
Refrigerate until serving time.
Serve cold, thinly sliced.

IRISH STEW


A warm bowl of Irish Stew


2 tablespoons unsalted butter
1 large onion chopped
3 pounds boneless lamb stew meat
2 teaspoons fresh thyme leaves or 3/4 teaspoon dried
Salt and pepper to taste

2 medium white potatoes peeled and sliced
3 cups chicken stock
4 medium potatoes halved
8 carrots peeled and halved

Cook onions and lamb in butter until onions are translucent.
Add the thyme, salt and pepper, slice potatoes and stock and cook for 2 hours or until meat is almost fork tender.
Add the potatoes and carrots and cook until the vegetables are tender.

For a traditional Irish stew do not thicken; for those of you who like a thicker stew then you may make a roux to add to the stew.

2 tablespoons lamb drippings
2 tablespoons all purpose flour
Salt and pepper
2 cups cooking liquid

Mix 2 tablespoons of lamb drippings and 2 tablespoons of flour over medium high heat to form a paste, stir in the 2 cups of cooking liquid to form gravy.

Add the gravy to the pot to thicken the stew.

MY DADDY'S LIMERICK HAM


Leftover Limerick Ham on Sour Dough Bread.


A traditional dish in Ireland, it is usually made with a whole ham but our family uses just the butt portion unless we use a whole semi-boneless ham. This recipe has been handed down in our family for more than 30 years.The orange juice was my addition and I doubt you’d find it used in Ireland but it is a nice twist to the recipe which can be left out if you desire.
Warning this ham is addictive and once you’ve eaten one prepared this way an ordinary baked ham just won’t do. You may substitute 1 tablespoon of pickling spices for the bay and cloves; whether you tie them up or just toss them in is left up to you as a person choice.

6 pound cured ham
1/2 cup cider vinegar
Equal parts of apple cider and water to cover ham
1 small onion peeled
2 bay leaves
6 cloves
8 tbsp brown mustard
8 tbsp brown sugar
Whole cloves
6 ounces frozen orange juice thawed (optional)

Put ham in large stock pot and cover with water/cider mixture, add vinegar, 6 cloves, bay leaves and onion. Bring to boil and simmer for 15 to 20 minutes per pound until meat begins to pull away from center bone. Remove from heat and leave soaking in pot for 2 hours.

Preheat oven to 350. Remove ham from pot and take off heavy skin, put ham in roaster, cut crisscrosses in fat. Reserve stock if using orange juice. Mix mustard and sugar into paste. Rub or pat over ham, stick cloves in ham. Mix orange juice and 1/2 to 1 cup of stock together and pour around ham in dish. Bake 30 minutes or until ham begins to brown.


My Dad's Limerick Ham on Foodista

Saturday, July 24, 2010

INA GARTEN'S PASTITSIO


My Pastitsio

The recipe is hers and its easy to follow; while it does take a little (lot) of prep work and time to cook it was well worth it. I had never heard of Pasitsio (Greek Lasagna) and at first when I thought I'd never make it again because it was not a quick dinner... however after tasting it I changed  my mind.

I was a little afraid when I read it had a Bechamel sauce as I did not know what this was... turns out it's white sauce... something I've been making long before I ever turned 16. It was the first sauce I learned to make at my daddy's side in the kitchen.

Rather than post the recipe, I've provided the link... please follow it and try this dish, I promise you it's wonderful!

http://www.foodnetwork.com/recipes/ina-garten/pastitsio-recipe/index.html

ALMOST KEY LIME CUPCAKES WITH WHITE CHOCOLATE FROSTING


I love Key Limes, Key Lime Pie and well just about anything made with Key Limes. I grew up in Florida, home of sunshine, citrus and yep you guessed it Key Limes.  For years I would have to purchase bottle juice when I went back home for a visit or maybe grab a bag of limes if I was lucky. Then the local discount store decided to carrry both the limes and the juice... until recently... shoot! Wouldn't you know it, I had my mouth set for something tart and sweet and well Key Limey.

Don't fear though, these cupcakes are divine even if I had to use a regular lime, they are worth the time. I could have eaten the bowl of frosting by itself but decided a trip to the hospital or sick in bed would not be worth it.

Dorie gave them 5 stars with the following comment:  "Granny.... (long pause as she swallows her bite) you sure make good cupcakes".


CUPCAKE BATTER

1 box Betty Crocker White Cake Mix

3 Eggs
1/3 cup oil
3/4 cup water
1/3 cup Key Lime juice
1 teaspoon lime zest

Mix batter according to package directions. Fill cupcake pan with liners and fill liners 2/3 full. Bake 18 - 20 minutes, check with toothpick for doneness.

Cool 10 minutes and frost with frosting:


WHITE CHOCOLATE FROSTING

5 ounces melted white chocolate
1/4 cup butter
1/4 cup Crisco
dash of salt
1/2 teaspoon vanilla extract
1 tablespoon of lime juice
3 1/2 cups shifted powdered sugar
Heavy whipping cream

Cream butter and Crisco, add melted chocolate, salt, vanilla and juice. Add powdered sugar. Thin frosting with whipping cream until consistency. Fill with bag and pipe on frosting or use a spoon.


Almost Key Lime Cupcakes on Foodista

Tuesday, July 20, 2010

FRESH FRUIT COFFECAKE


This recipe is adapted from the first dish I ever made with Blueberries. We were living in Connecticut and bought some local berries and I pulled out my only cookbook at the time and I found this wonderful recipe that I decided to try out and being generous I ended up making half a dozen and sending them to work with my husband.  My grandfather called this a Kuchen (German for cake). Twenty years later along with a few alterations and its still a favorite…

Have all ingredients at room temp. Put rack in lower third of the oven and preheat to 350 degrees. Grease a 9x2 round pan.

Whisk together thoroughly:
1 cup all purpose flour
1 Tablespoon baking powder
1/8 teaspoon salt
In large bowl, beat on medium to high speed until light and fluffy (3 to 4 minutes)

8 Tablespoons (1 stick) unsalted butter
¾ cup sugar

Beat in 1 at a time until just blended:
2 large eggs

Stir in the flour mixture until just incorporated. If batter is too thick (should be like brownie batter) then thin with about ¼ cup of milk. Scrape batter into the pan and spread evenly.

Combine:
1 Tablespoon of sugar and ¼ teaspoon of cinnamon and sprinkle over
2 cups fruit (if using Peaches, sprinkle with Fruit Fresh or lemon juice)

Sprinkle this mixture over the top of the cake and bake until top is a golden brown and a toothpick inserted in the center (avoiding fruit) comes out clean, about 40 minutes. Let cool to room temperature before serving.

Frsh Fruit Coffee Cake on Foodista

PALM PLATE REVIEW


Not an Adaka Palm, but one I fell in love with off the coast of South Carolina.


As most of you know I detest using paper or Styrofoam plates and for years have kept a supply of off-white dishes stashed away for large gatherings… but every once in awhile we all break our rules and yes I have been known to use recycled paper products, but now I’ve found something even better… Palm Plates.

When I saw that Marx Foods was offering a free sample I jumped at the chance to try them out and do a review as I love new kitchen products especially natural and eco-friendly ones. And of course being a lover of palm trees, tropical locals and anything to do with the beach… I jumped at the chance. Not since I saw my nephew carve a totem pole from one of the old palms from our grandfathers property have I seen such a wonderful product made from palm…

We loved them here at the Black house; I rushed to open the box when it arrived and we all stood around oohing and ahhing at the way they looked and even felt. To be honest they were so pretty that I did not want to use them and throw them away! But we did.


First I served lunch on them, nothing fancy. Homemade chicken salad sandwiches and potato salad, then after supper we tried out hot Peach Cobbler on them… finally today I gave them a real work out and allowed my two granddaughters to use them as finger-paint palettes.


No cracking, breaking apart or sagging occurred even after several hours of sitting with paint in them they still are holding up although the middle is getting a little soggy where it is wet… what a wonderful product, one I hope you all try out and recommend to friends.


Made from the leaves of the Adaka palm tree, they are not only eco friendly but elegant as well.
The leaves are gathered as they naturally fall from the trees and never pulled or cut. After they are gathered they are washed and then allowed to air dry and then stretched, flattened and cut into various size plates.
No harsh chemicals, dyes or toxic anything is used it the processing of these plates, just water, turmeric, the sun and air. How much greener could you get?

Monday, July 19, 2010

DARK FRUITCAKE WITH GRAND MARNIER

Don't let the name scare you, we've all heard the horror stories of fruitcake, but believe me this cake is dense, moist and chock full of goodies. I dare anyone to try it and not like it!

It took me years to get my fruitcake recipe as I wanted it. I began with an old recipe in my grandmothers Amy Vanderbilt cookbook, added this, took out that and finally we ended up with this recipe.

Last Chrismtas I decided to change and use Grand Marnier and a Peach Wine I bought in Tennessee instead of the usualy Rum and people loved it. I have in the past used various liquours included Rum, 50 year old Jack Daniels and Peach Wine from Habersham Farms.

The orignial recipe called for Dates and Currants which I left out as I don't like dates and have never seen Currants for sale here in our area.
7 cups of candied fruit as follows:
2 cups of cherries
2 cups of pineapple
1 cup of mixed fruit
1 cup white raisins

Cover and soak fruit for at least 24 hours in equal parts of Grand Marnier and Peach Wine. Drain fruit well before using.

Have all ingredients at room temp, preheat oven to 300 and grease and line bottom and sides of pans with paper bag and Crisco.

Sift together

3 cups all purpose flour
1 t baking powder
1/2 t baking soda
1 t ground cinnamon
1 t ground nutmeg
1/2 t ground mace
1/2 t ground cloves
In a large bowl beat until creamy about 30 seconds:
2 sticks unsalted butter
Gradually add and beat on high speed until light in color:
1/2 cup dark molasses
2 cups packed dark brown sugar
Grated zest and juice of 1 orange
Grated zest and juice of 1 lemon

Add the flour mixture in 3 parts, alternating with 3/4 cup of brandy or wine (Grand Marnier)

Beat on low speed or stir with rubber spatula until just blended.

Drain fruit, add 2 cups chopped nuts (I used a mixture of walnuts and pecans toss this with flour and shake off excess, add to cake batter.

Scrape into pan and bake for 3 1/2 hours, if cake is getting too dark, place foil on it for the last 30 – 60 minutes.

Let cool in pan on rack for 1 hour, invert on rack and remove paper to finish cooling.

I then poured Grand Marnier onto a linen towel and wrapped it around cake and drizzled more on top…

Grand Marnier on FoodistaGrand Marnier

Saturday, July 17, 2010

ALABAMA CAVIAR -- TEXAS CAVIAR - BLACK-EYED PEA SALSA


Black-eyed Pea Salsa on Salad

No matter what you call it, this is a great treat. I though my momma had lost her mind when she first told me about black-eyed pea salad… it took me years to try it but when I did I fell in love with it.


2 cups black-eyed peas, cooked
3 Roma tomatoes
1/4 cup purple onion, diced
1 clove garlic, finely minced
1/2 chopped green bell pepper
1/2 chopped yellow bell pepper
1/4 cup chopped parsley
1/4 teaspoon sugar
Dash of Tabasco sauce
1/4 cup cider, red wine or balsamic vinegar
1/8 cup water
Salt and pepper

Directions

1. Combine black-eyed peas, onion, peppers, tomatoes, parsley, vinegar, oil and sugar
2. Season with salt and pepper.
3. Marinate for 12 to 24 hours before serving.
4. Serve with tortilla chips or use as a side salad.


Alabama Caviar - Black-Eyed Pea Salsa on Foodista

FIELD PEAS: BLACK-EYED, CREAM, CROWDER & PURPLE HULL


Field Peas or Cow Peas can be found all over the world; from Africa, Asia & Europe to South, Central and North America. There are hundreds of varieties in four different groups and everyone has a favorite. They can be cooked fresh or bought dried and cooked.

Here in the South; peas are usually cooked with some sort of pork; bacon, fatback, ham hocks, or leftover ham were added to the pot of peas. I gave up the pork in my peas some time back but if you must go ahead and add some as it does lend a nice flavor.
My mother always added cut up or whole Okra to her peas during the last 5 to 10 minutes of cooking. Although I love fried Okra, I have never developed a liking for the texture if its cooked too long as it becomes slimy. I prefer mine to have a bit of firmness to it.

Fresh peas are simple to cook. All it takes is some peas, a little seasoning, water, a pot and a watchful eye! Peas can burn in seconds if you allow the water to cook out. My family almost gave up on me ever cooking them without burning them; in fact my husband’s cousin used to cook them and hand them over so he could have some.
Leftover peas are wonderful just to eat but they may also be used to make fritters, salsas or added to salad. The Black-eyed pea Salsa is wonderful change, give it a try and surprise your family and friends at the next party and make what some call Alabama or Texas Caviar!


FRESH PEAS

4 cups fresh field peas (Crowder, Purple Hull, etc)
6 cups water
Salt and Pepper to taste
3 strips cooked bacon (reserve 1 tablespoon of drippings)
5 or 6 cups whole Okra

Put peas in saucepan and add water to cover.
Bring to boil.
Reduce heat and add salt, pepper and 1 tablespoon bacon drippings.
Cook for 15 minutes.
Add Okra and cook another 10 or 15 minutes.
Serve as a side dish, over rice or cornbread.

FRESH PURPLE HULL PEAS

4 cups purple hull peas
1 – Medium smoked ham hocks or chunk of leftover ham bone
1 med. onion chopped
3 or 4 tablespoons of bacon drippings or oil to cover bottom of pan

Put oil in a pot and on a medium heat saute the onions until slightly brown.
Add ham and cover with water.
Boil ham hocks about an hour, remove and cut meat away. (if using ham bone about 15 minutes)
Discard any fat and return meat and bone to the pot.
Add peas and enough water to cover the peas.
Reduce heat to a simmer and continue to cook peas until they are almost tender.
Add water as needed and stir occasionally to prevent sticking.
Add salt as needed. You will need to taste as you cook.


Fresh Field Peas on Foodista

Friday, July 16, 2010

Farms, Farmers & Roadside Stands Photos


Emment & Dot Black's
Hwy 70, Barnwell SC


Fresh Peas


Okra


Black eyed Susans in a hanging basket


 Watermelons in a wagon


----------------------------------------------------------------------------------------------------
Herb n Berries U-Pick
Montomernci SC


Blueberries on the bush


and in a bowl.

---------------------------------------------------------------------------------------------------

Chappell Farms
Kline, SC


Elberta Peaches

------------------------------------------------------------------------------------------------------

Neighbors, Friends & Family


Green Beans from Cala & Eddie Myers

Sunday, July 11, 2010

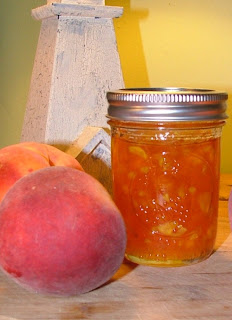
VANILLA PEACH JAM


Chappell Farm Peaches
From the roadside stand in Kline, SC


To Camella's kitchen
Snelling, SC


3 pounds of fresh peaches
Juice of1 lemon
1 teaspoon Vanilla
1 tsp Fruit Fresh
1 box Sure Jell
5 ½ cups Vanilla Sugar*
½ teaspoon butter

*Prepare vanilla sugar at least 3 days in advance (best if allowed to sit 1 week) or purchase store bought

Vanilla Sugar:
Bury 1 vanilla bean pod (scraped or not) in an airtight container with 4 pounds of sugar
Remove pod before using sugar
Measure exact amount of sugar into a separate bowl

Before beginning jam, place canning pot (with rack) half way with water and bring to a boil
Also have another small pot of water simmering in case you need it to cover jars

Peel, pit and dice peaches
Place into a 6 to 8 quart saucepan
Add Fruit Fresh
Stir in lemon juice
Stir 1 box SURE-JELL into fruit
Add ½ teaspoon butter
(to reduce foaming)

Add vanilla
Bring mixture to full rolling boil
Stir in sugar quickly
Return to full rolling boil
Boil exactly 1 minute, stirring constantly
Remove from heat
Skim off any foam
Ladle quickly into prepared jars, filling to within 1/8 inch tops

Wipe jar rims and threads
Cover with two-piece lids
Screw bands tightly

Place jars on elevated canner rack
Lower rack into canner
Water must cover jars by 1 to 2 inches
Add boiling water if needed
Cover; bring to gentle boil
Process 10 minutes


Vanilla Peach Jam on Foodista

Wednesday, July 7, 2010

DORIE'S BLUEBERRY PIE


Blueberries waiting to be picked.
Herb n Berries U-Pick
148 Keeper Lane Montmorenci, SC


Blueberry Pie, well what Dorie usually asks for – Dorie gets… so when we were out picking Blueberries in the near 100 degree weather this morning and she said she wanted a Blueberry pie I went home and made one (after resting several hours and waiting until the sun went down to turn on the oven).


Althea and her empty bucket...

The girls taking a rest and laughing at us adults!

Never having made this type of pie I was a little afraid it would be runny, but it didn’t do too bad (of course if we adults had allowed it to cool it may have been set up better). I told Dorie not to burn her “goozel” (more on that one day) we tore into it… all except Dorie who took a little bite and then another; and then she shuddered. As we kept on eating, she tried it again, this time with a big shudder like she had a chill and making a sound (not exactly a gag but close).

Seems as if she had never eaten Blueberry pie and really didn’t know if she liked it (she didn’t) but she so wanted someone to make one (which I did).

Needless to say we girls still had a good time, picking blueberries in the hot Carolina sun, sipping water and heading off to eat lunch together afterwards.


Bowl of berries...


Not the best looking pie (we ate half before I thought about a picture) but it sure tasted wonderful!


Dorie’s Blueberry Pie

5 cups fresh blueberries
1 cup of sugar
6 tablespoons cornstarch
Juice and zest from 1 lemon
1 tablespoon of butter cut into small pieces
2 pie crusts (I cheated and used refrigerated pie crust)
Water
Pie pan
Cookie sheet

Preheat oven to 425 degrees, mix berries, sugar, cornstarch and lemon zest and juice in a bowl allowing it to sit for 20 minutes.

Place 1 pie crust in pie pan and then pour berry mixture into crust, top with butter pieces and then brush top edge of crust with water before placing second crust on top. Pinch to seal crusts together and then pinch or crimp with fork.

Cut several small slits in top of pie crust and place in oven, cook for 30 minutes. Carefully place cookie sheet under pie, reduce oven temperature to 350 and bake for 30 more minutes.

Pie will be still be a little runny; allow it to cool before slicing or better yet grab a spoon and go for it!


Dorie's Blueberry Pie